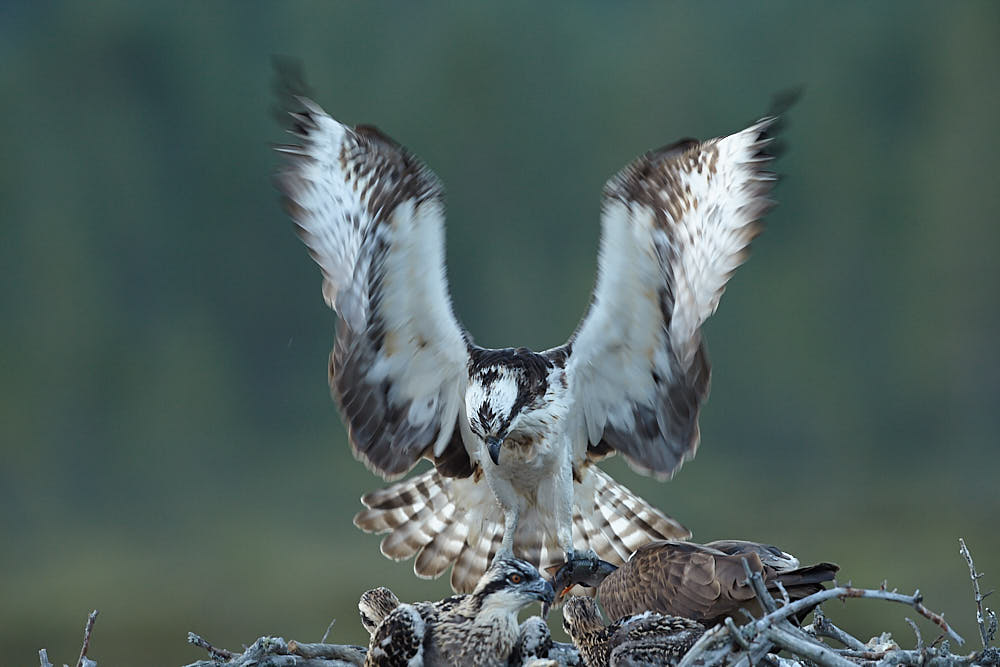
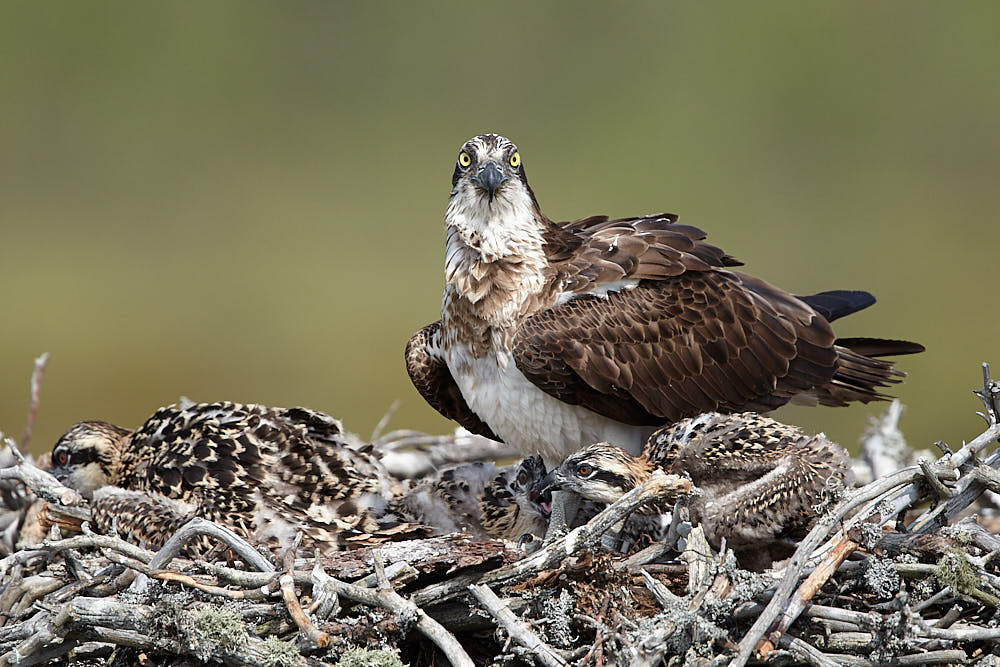
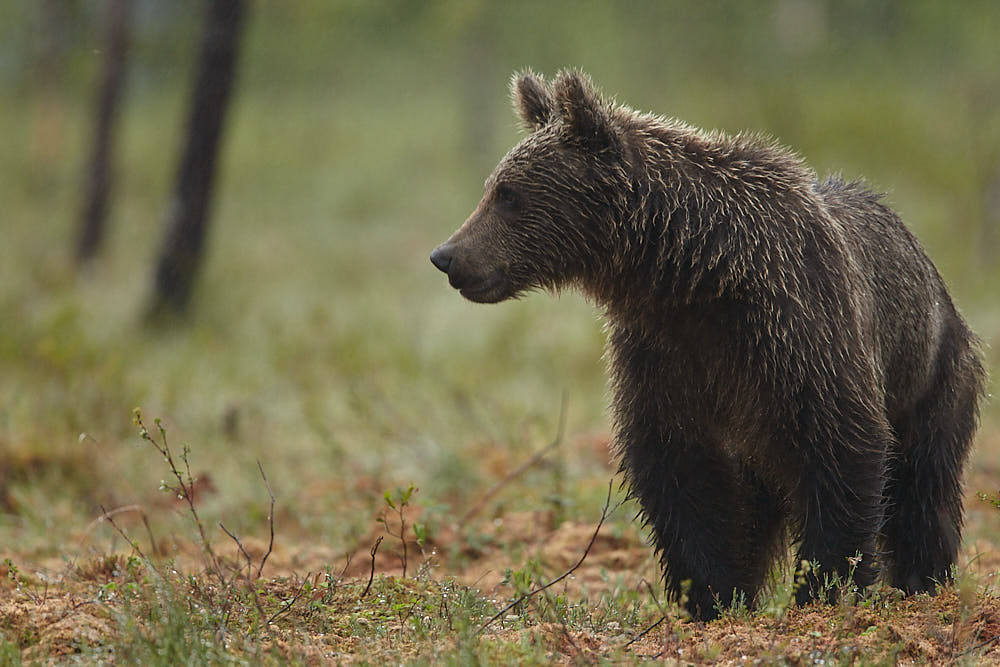
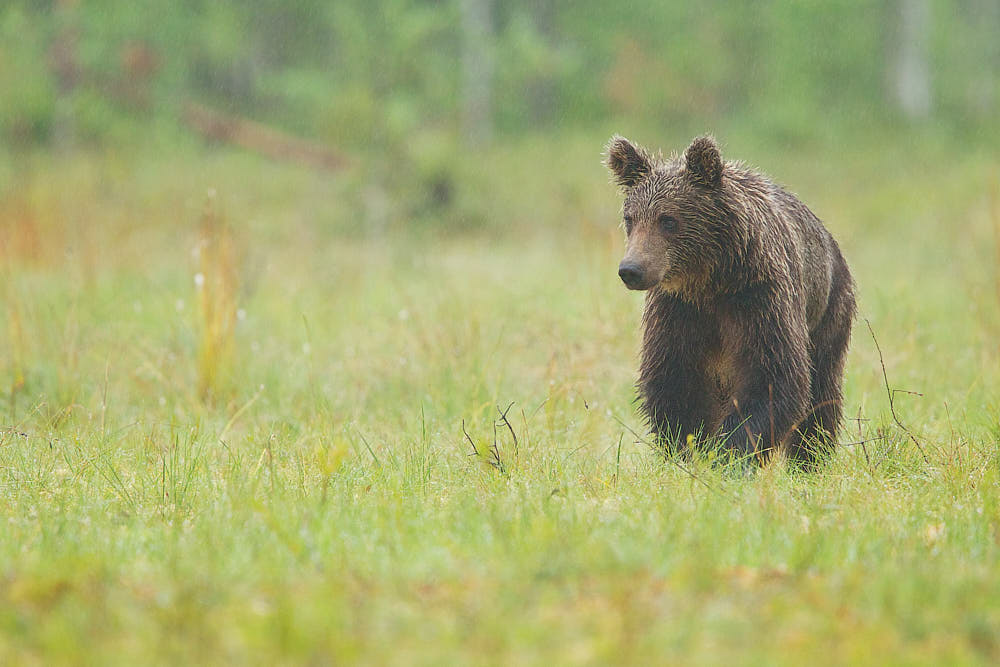
Eagle Owls and Goshawks in Snowy Finland

Finland

EAGLE OWLS & GOSHAWKS

DAY ONE

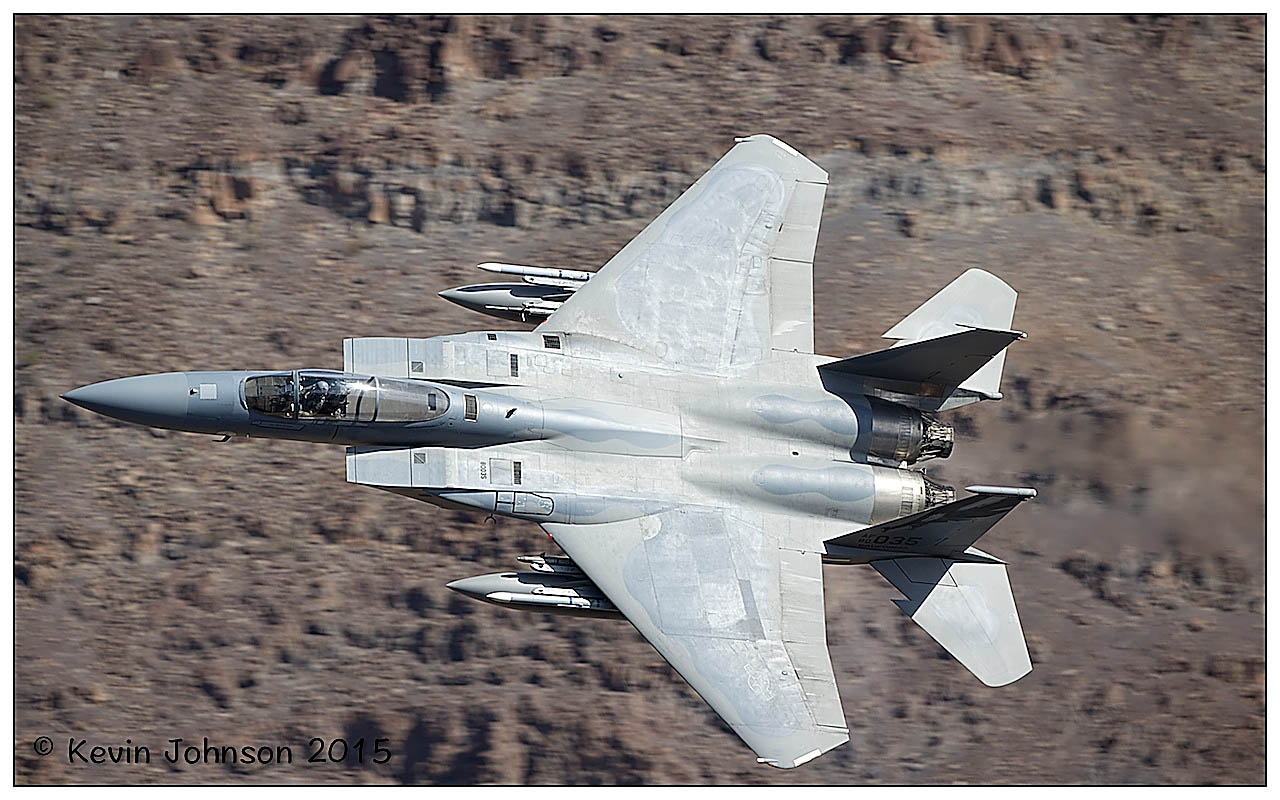
So i was lucky enough to get over to Finland in early 2023 to try get some images of the Northern Goshawk and the Eagle Owls. I went with a company called Finnature – a local based company that has been operating some such tours for the past twenty years now. I paid for two nights in the hides in the hopes of seeing the Goshawk and the Eagle owls. This is what i took away from the visit and the experience.

So the day starts around noon with a meeting with your guide – in my case it was Jari from Finnature. I met him at the Visitor Center just outside Liminka. Liminka is about 25 minutes from Oulu and the visitor center is about 6km outside Liminka. We drove 2km back to the hide locations – it is off road a little and if you are planning to head into town the following day for supplies take note of the twists and turns to get there and back again. Everything looks different in the dark compared to driving in in daylight. The hides are converted caravans and they are done really well. I was in one and another photographer was in the other. I setup the R3 with the 500mm in one window with the gimbal head and the R5 with the 100-500 in the other window with the ball head. There is a good field of view with regards to the perch in front of you and to the side areas where the smaller birds will feed.


Camera setup in Liminka eagle owl hides in Finland

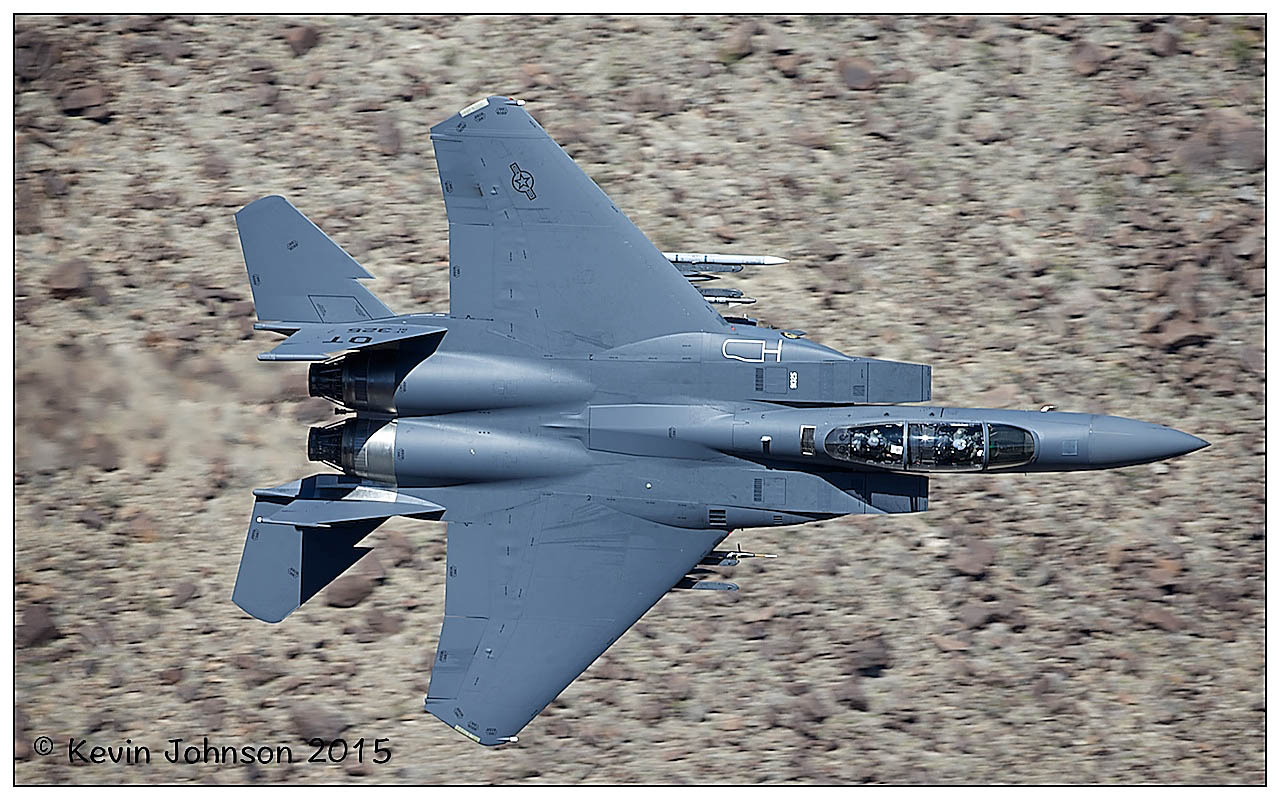
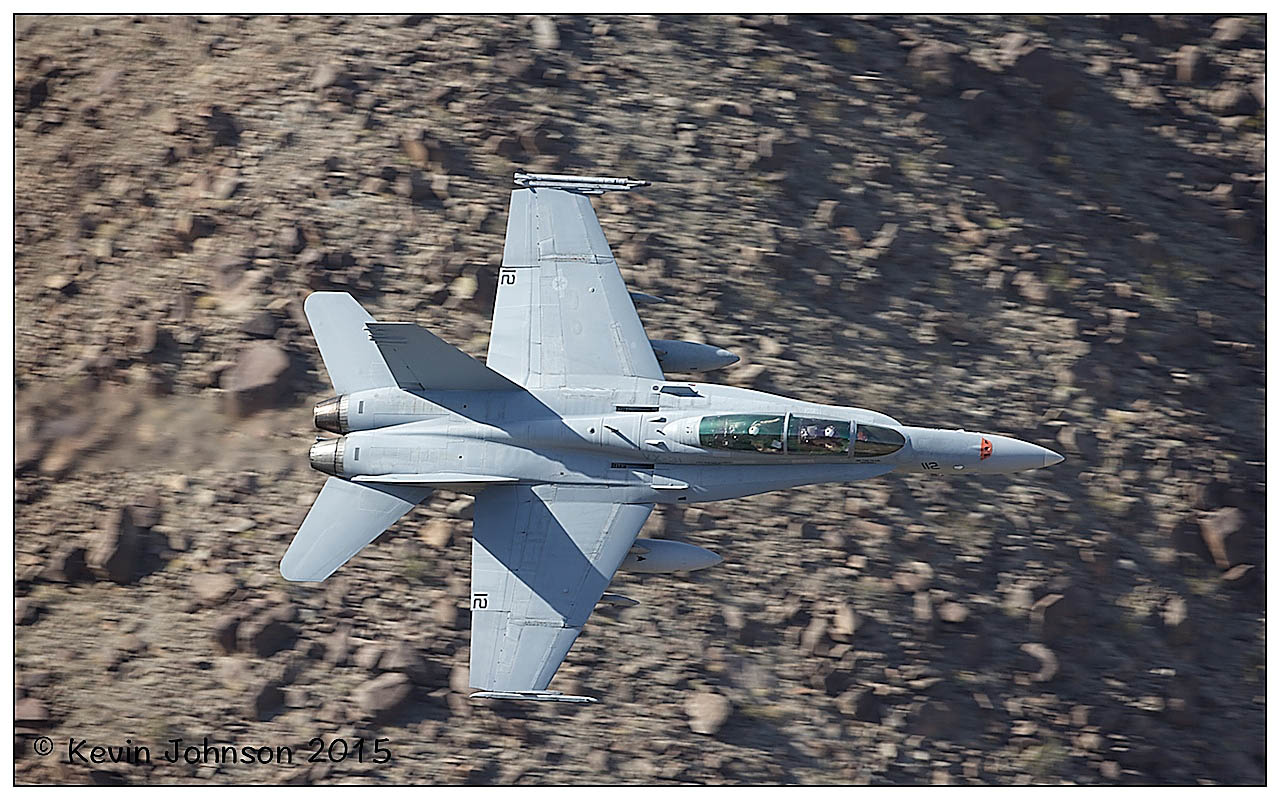
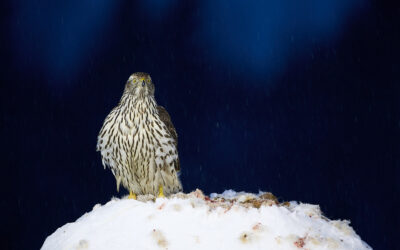
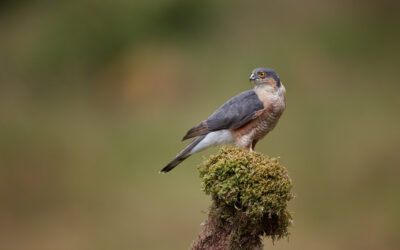
Within an hour there was a Goshawk in and feeding. The day was dull in January and overcast so you are going to need a high ISO if you want to capture any action shots. 500mm is good on a full frame for this bird but not if there is fighting or wing spread action shots involved. Also you are shooting slightly below the perch so you are looking up towards it a little. You are also crouching in the chairs a lot if you plan to use the viewfinder. This was my approach as there was no power in the hides and I did not want to deplete my two batteries in the R3 in the first day. There was no way to re charge them. I used the viewfinder for most of the first day and did not review any image really. At the end of 24 hours i had 50% battery left and over 1100 images taken. I was confident now that I could relax a little going into the second day of shooting. I would not be taking as many images again as the first day was a novelty for me. The R5 handled well also again shooting over 1000 images off a single battery. The hides are warm so the cold does not adversely affect your batteries. However it is always good to have spares when in here for a few days. I brought a battery pack with me that will charge the R5 batteries if needs be – I could not get one for the R3 but it looks like i will be ok on both fronts anyways. I am careful when it comes to image review and leaving screens on etc at the start of a shoot – quick auto power off and prefer to use the eye finder as opposed to the touch screen. This gives me the most out a battery. I also record short videos where possible and again this saves on the battery.


Goshawk on a perch in Finland

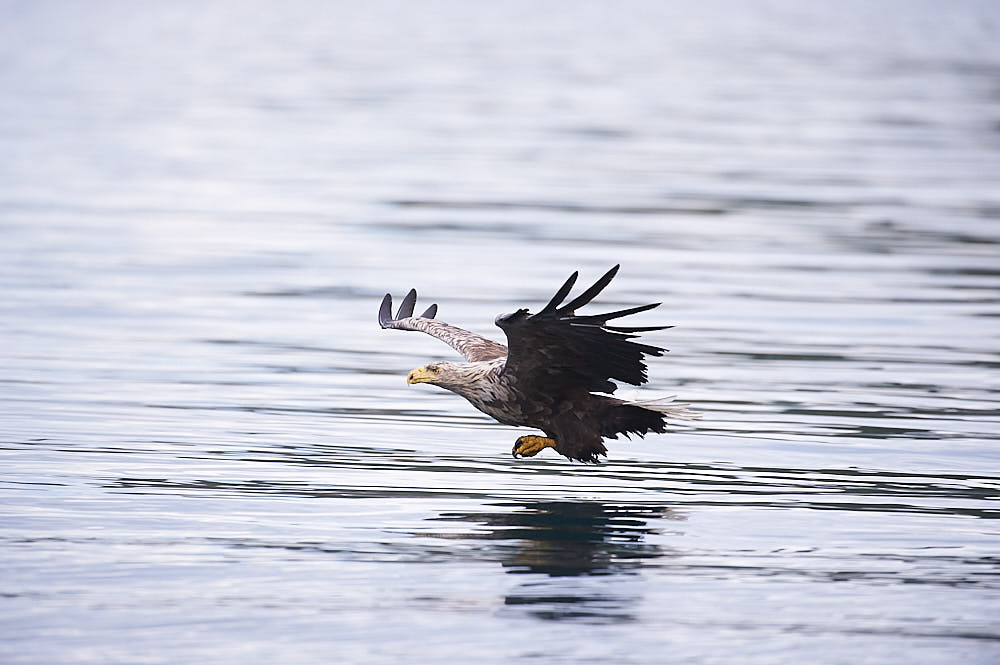
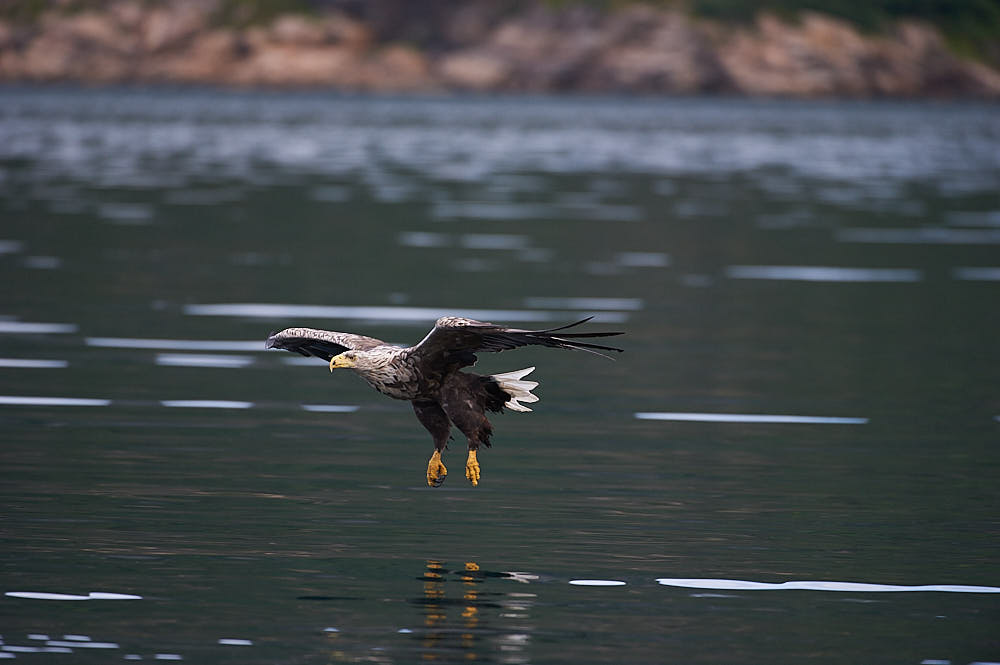
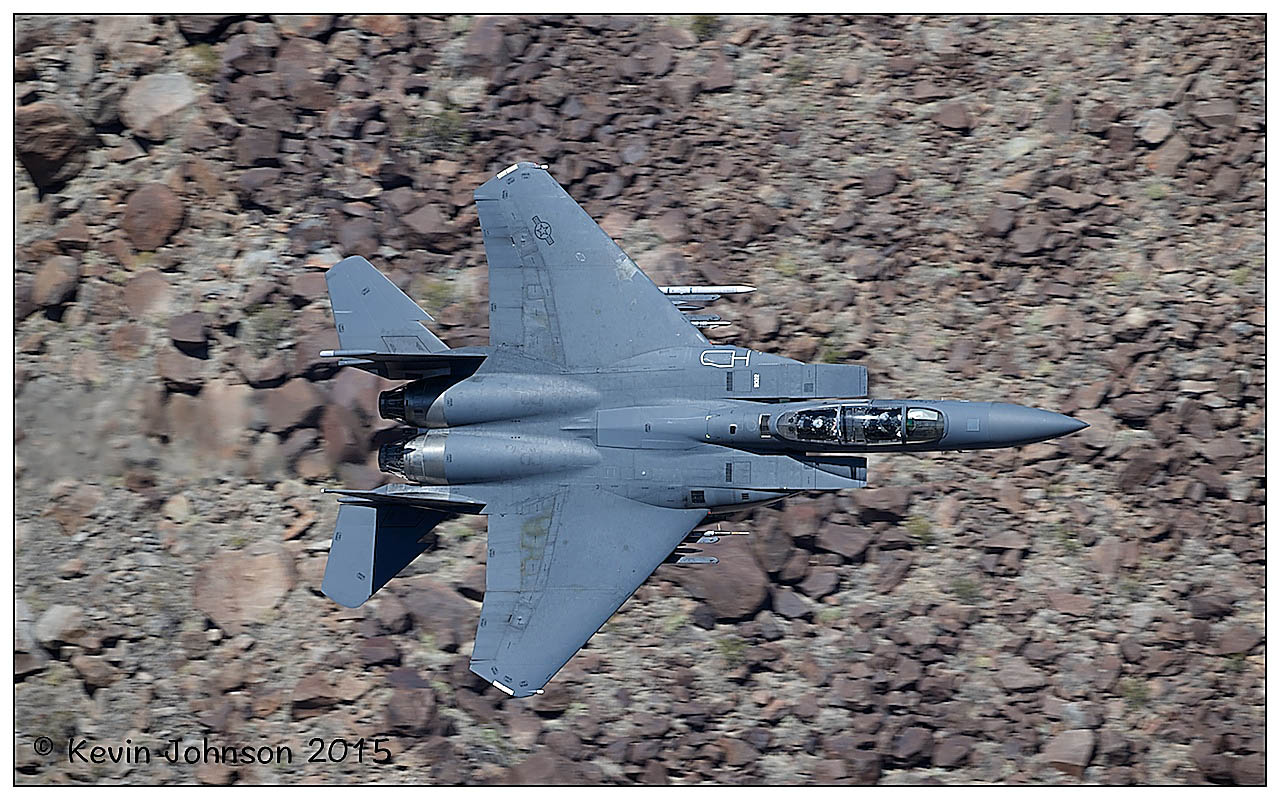
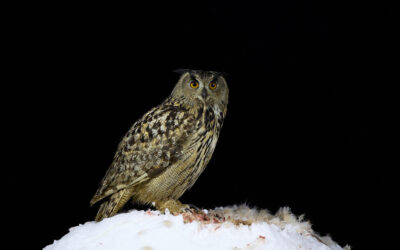
The Goshawk left before 1600 and the owl came in for an hour to feed. There was still some light in the sky behind but not a lot. Jari said to turn on the lights on the perch around 1500 and we did . We needed them . Even with those lights on – you still need a high iso if you plan to shoot the owl moving around ie shutter speeds of 1/320+ will see you shutting 8000 iso or higher. I was shooting on the 100-500mm here for my aperture was 7.1 at 500m. Once you get some keeper images you can of course experiment and drop the iso and shutter speed yourself to try get cleaner sharper images. Once the owl left it turned out to be a long quiet night after that. There is a buzzer in the hides that alerts you when there is something on the perch – however the buzzer is low and you need to be a light sleeper in order to hear it. I don’t know if i heard it at 0400 or not – i woke up and the owl was there and i got 30 minutes of shots before it headed away. It was a quiet night according to Jari but i was still happy as i had two visits from the owl and the Goshawk was in also so for me it was win win. I went back to bed and got some sleep .


DAY TWO

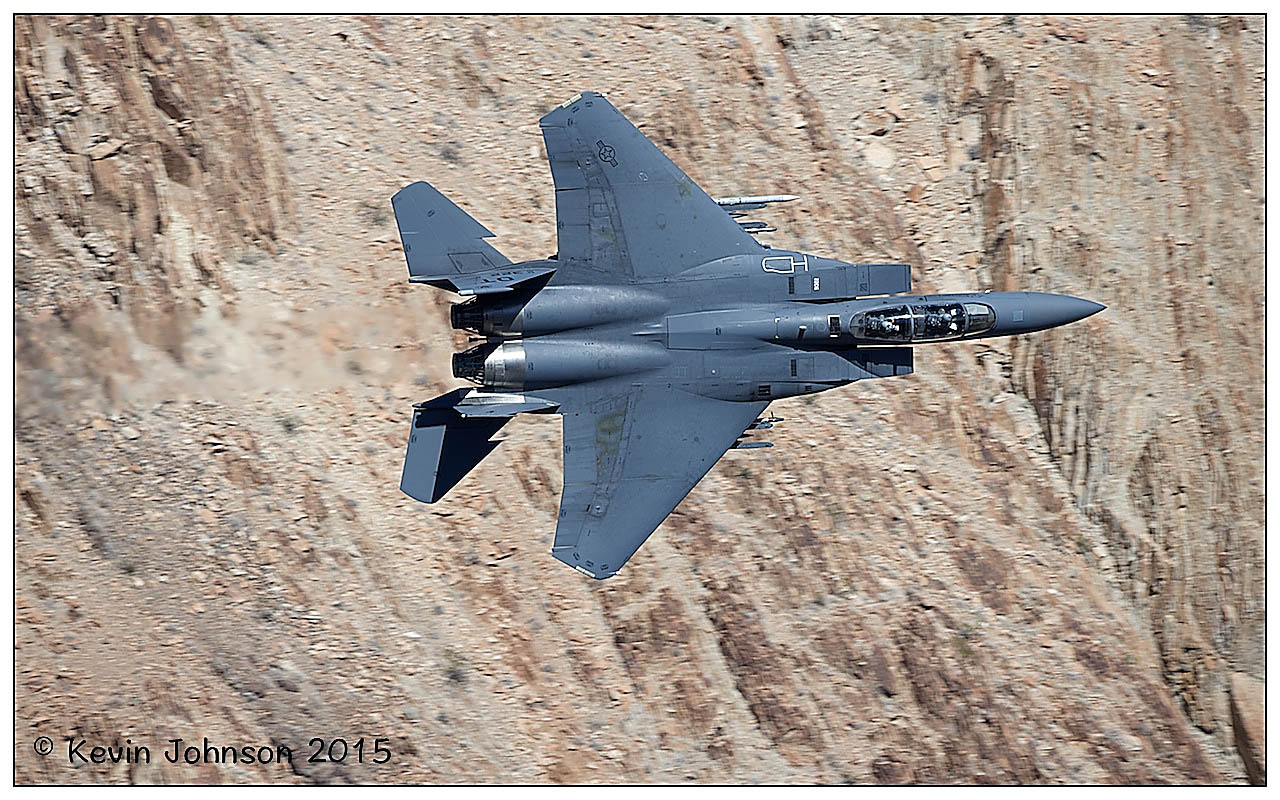
The following morning I got up around 0830 as it was still dawn outside and the light was only starting to arrive. I checked my cameras from last night and got a cup of coffee and sat down to wait. I did not have to wait long. 0900 and the Goshawk was back in and feeding. It transpired that she stayed for over 4 hours – with several mobs from other Goshawks trying to get her off the perch and the food so they could feed. A very loud and interesting morning . The small birds were at the feeders – blue tit, great tit, yellowhammers , finches , Jays, woodpeckers and there was even a squirrel in front of the hide I was in. I did see a willow tit also but did not get any good images of it unfortunately. I left the hide at 1500 and headed into town when the maintenance man was there cleaning up and putting out some new bait for the night. It was a dead hare. Most of the bait is roadkill from what i understand. I got into town – got a hot meal and some food at the supermarket and then headed back to the hides again. I forgot to take in my flask to get hot water for coffee and tea but i was ok. I got back to the hides and resettled by 1630. It was dark now and i turned on the lights on the perch. There was no action again till 0100. The owl was in but only stayed about 15 minutes. I got dressed and settled down to take some images and got a few before it flew off. I waited around but no return. The owl was back again at 04:00 but only stayed for 15 minutes or so. I went back to bed and the owl came back in around 0430. I stayed in the sleeping bag this time and got some shots before it flew off at 0445. Maybe i was spoilt the day before with the long visits – maybe this was more like the bird and how it behaves. I didn’t see the owl again for the rest of the trip. I got up at 0900 and the goshawk was waiting on the crossbeam over the perch. I turned off the perch lights around 0930 and got some shots and then got some breakfast. The light was to be nice this morning with some sun but cold today. Temperatures set to drop to -8 or -9 by the end of the day. Hawk stayed around till noon- then it knocked the hare off the perch before flying away. Two more hawks came in looking for food and only found scraps. I finished up around 1400 and loaded up the car and headed away – on to my next adventure – The Golden Eagles! .


Eagle owl on perch in Finalnd in early January


Goshawk in early morning light


Jedi Transition – aka Rainbow Canyon 2015

Rainbow Canyon aka Jedi Transition

Duration: 7 days, 6 nights
Location: Lone Pine, CA
Budget:
Miles Travelled: 3,000+

Kevin and Paddy headed to LA for a day before driving a few hours North East towards a small town called Lone Pine. It was here that we were based for the week ahead to try to get some shots of low level flying (LLF) through the Rainbow Canyon - aka Jedi Transition.

The lookout point is around 45 minutes drive away from Lone Pine and it is pretty remote. Lone Pine offered the best accommodation, food and amenities based on the location.

Rainbow Canyon is part of the R2508 Special Use Airspace Complex, in Panamint Valley.  The Canyon is a part of the much larger Sidewinder Low Level route, and is officially called “Jedi Transition”.  Rainbow Canyon itself is also known as Star Wars Canyon. It is said that some movie scenes of the Star Wars movies were shot here.

The Jedi Transition starts just west of Owens Lake at 36.403047,-118.01239. From here aircraft hug the desert floor and pull up just before the canyon to clear higher levels. From there they enter the Canyon at Father Crowley Point, and continue through the Valley and exit the valley 3 miles from Father Crowley point. Most aircraft call up at 315.9 Mhz before entering (only pilot to pilot communication). The direction of flight is published as east-west but we have seen aircraft going the other way. Thanks to Ron for the information.

I put most of the information that I could find in the area on a Google Map – image shared below.

Map locations

The circled point in the center of the map is Father Crowley Point and car park. On the far left of the map , above the triangle and Owens Lake, is Lone Pine and the Comfort Inn where we stayed. Really nice accommodation, close to the turn you need to take in order to travel to the lookout and parking and about 1.5 miles outside of town. Breakfast was included and free wifi, parking and the usual other pieces. We headed into town each night and went to the local supermarket, Josephs, and got supplies for the following day. The supermarket was usually open till 20:00 each night so we were back from the hills by then.

A typical day ran something like this : get up at 07:00 and get some breakfast, then pack the bag and be in the car and moving by 08:00. The drive across was approx 49 miles from when you turn onto the road. There are mile markers on the side of the road as you are driving and Father Crowley Point is at mile marker 47 – give or take. You keep driving past this to mile marker 49.5 and on the right hand side – just after it – there is as pull out area where we parked the car. The walk to to hilltop takes about 10-15 minutes and then you are in place for the day. It takes about an hour to get from the hotel to the hilltop as traffic is usually light. We had an F/A-18 Hornet pass us the first evening as we were coming home around 18:00 hours and again another morning as we were heading out around 08:40 so traffic is definitely not restricted to 9-5 in the Canyon.

On Monday, we were caught napping with a pass from an F-15E Strike Eagle westbound at around 10:00. It being our first day, and not having a scanner, we just waited. The Eagle flew through and I did not get any shots of the first pass but he saw us and exited the Canyon beyond Father Crowley Point and came back through for us – East bound. This time we were ready …

West Bound

East bound

Early morning and later in the afternoon are probably the best times of the day to shoot but one cant be picky when you travel from Ireland to this great location. All in all we had 7 passes on Monday, 8 on Tuesday, 9 on Wednesday and 6 on Thursday. It was spring break and Easter Week so that might have cut back on the amount of flying in and around the area – I don’t know – but I was grateful for all the passes that went through.

Early afternoon and this camo F-15C came through and I had the shutter speed down a tad too low for the capture. The image is here for show more than anything else …

We had several F/A-18 Super Hornets and I think some Hornets or Legacy Hornets also when we were there …

F/A 18F Growler VX-9 "Vampire" burning through the Canyon

The Growler is an electronic attack aircraft. It is capable of disrupting, deceiving or denying a broad range of military electronic systems, including radars and communications.

F/A-18E Knife Edge through the Canyon

The EA-18E Growler is an electronic attack aircraft. It is capable of disrupting, deceiving or denying a broad range of military electronic systems, including radars and communications.

Canyon Floor View

A view of the hornet as it sweeps the deck and heads away across the canyon floor before pulling out as it reaches the wall – approximately 3 miles from the view point.

We had a special visit from an X53 NASA modified F/A-18 on the last morning also – the pass was high but I included the images here for show more than anything else. A C17 came over the hill to the right of Father Crowley Point also and dropped down into the Valley – impressive and huge…


They can be seen in the Photo Gallery for the trip along with some other nice shots from the excursion.

Recent Travels

Below is a collection of the most recent articles , galleries and blogs on the site – feel free to look through them and let us know what you think!

Antarctica – Photo Gear

So if you are lucky enough to be going to Antarctica then all I can say is “Well done” as I know that it is a place that few people will get to travel to in their lifetime. It is an expensive excursion and one that few people will attempt to take on. In fairness, there are easier ways to spend 10-15K USD right.

But enough of that – you are here because you are thinking “How much camera gear do I take with me” or “What camera gear do I take with me” on this Epic Trip 😉

Well I was lucky enough to get out here in December 2013 with my brother and all I can say it that we were really blessed with weather, travel locations and ship routes etc. I will fill you in on what I took on the trip and will hopefully write another article on the actual trip itself in due course.

So I am going to make a few assumptions here before going any further – namely that you are a Semi-Pro or Professional photographer or a budding up and coming photographer with a lot of gear and cant decide on what to take.

I found another article online this morning that relates to the bag that I took – a Guru Gear 32L bag. There is more information here on the bag and what is included in it. Nice light reading.

PDF Document on Equipment and Gear

 I created a document that I spliced together from several different sources on the Internet and books on what gear to bring. I was also fortunate enough to have some friends that headed out there in January 2013 – a main reason that we headed out there in December actually.

So what did I bring and what did I leave behind and what did I regret taking/not taking on the trip.

Camera Bodies

  • Canon 1D-X
  • Canon 1D Mark IV
  • Fuji Finepix X100
  • Go Pro Hero 3+

Lenses:

  • Canon 500mm f4 IS USM Mark I
  • Canon 70-200 f2.8 IS USM Mark II
  • Canon 24-70 f2.8 Mark I
  • Canon 16-35 f2.8 Mark II

Accessories:

  • Battery Chargers ( 1D-X/Mark IV, Fuji Finepix & GoPro)
  • Power Cables and adapters
  • Spare batteries
  • Memory Cards
  • External Hard drives x2
  • CIR Polarising filters (77mm)
  • Card Reader
  • Lee Filters – ND Grad
  • 10 Stop BnW Filter
  • Tripod
  • Monopod
  • Wimberly Gimbal Head (for 500mm)
  • Rain Covers for 500mm and 70-200mm lenses
  • and other bits and pieces


The majority of this gear went into the Guru Gear bag – as seen above. It all packed away nice and neatly and there was no problem anytime getting the bag into any of the overhead storage units on any of the flights. Weight wise it was probably coming in around 14-15kg in weight but I took a chance and hoped that it was not going to be weighed. If I had to pay at the airport I was willing to do that – safer than checking it in.

I did have another small padded day bag that I used when in the cities and walking around the place for sightseeing in Buenos Aires and Ushuaia. I put some of the cables and battery chargers in here and checked those in as they were safe enough and I would be ok if they did not make it down for a few days.

So here are some questions that I think might be of interest to people that are traveling and hopefully the answers will help you decide on what to bring and what to leave behind. Again this is just my opinion and what worked for me at the end of the day – it is not necessarily the best or worst idea out there – it is just an opinion.

Q: Do you really need a tripod? 
A: I think that a light one is useful. There was two of us and we shared the use of it between us. On the boat I got a bit more use out of it that I thought. I used it a lot with the GoPro to just shoot timelapse or footage from different angles and aspects of the boat. We also camped so we got to use it then and also in Ushuaia. Dont bring a big heavy tripod – take some travel worthy and light and it should come in handy.

Q: Did you use the rain covers ? 
A: I did use them at the start a lot – just being cautious. We were really lucky with the weather. I took off the covers after a day or two as I did not need them any more. I also had a neoprene cover for the camera body but never used it. It is a good idea but the battery life is really good in the 1D models so I did not need it. It also makes adjusting settings a lot more awkward and if there is a humpback whale or leopard seal or penguin active near you – the last thing you want it try to change aperture or ISO setting through a cover and protective layer and then with gloves on. Pack them – have them there just in case but use sparingly. If the weather is nice then you are good. If there is snow out then take it with you.

Q: How many memory cards did you take with you?
A: Me personally I think I had nearly 200GB of memory cards, 4x32GB, 4x16GB and some 8GB SD cards and several 4GB cards. All worked fine for me for the trip and I probably shot close to 130GB of images or 5100 odd images in the space of the two weeks that we were away. We had a laptop with us, so we backed up the cards each evening to our external HD’s and left the cards with the images also so we had a secondary backup just in case. Then on the last day we copied all the folders to the other persons HD so there was a third backup – just in case. All worked out nicely now thankfully.

Q:Do you really need a laptop?
A: I personally think it is a good idea. First you can use it to backup your images when you want. I know there are computers on the boat but they are in use a lot of time so access can be restricted. It is nice to be able to backup your data when you want. It is also a good idea to have some TV Shows or Movies with you to look at in case you need to pass the time on the Drake Passage or something – you might be under the weather and need something to take your mind off things.

Q:Did you use a CIR Polariser a lot ? 
A: Once we got down to continental Antarctica itself I did put it on the 70-200 and the 24-70 and used it for shots of the ice, water reflection and landscape shots. I think that it is no real weight to carry and it does come in handy when you are down there so take it and use it .